Posts Tagged ‘ quick guide ’

Creating Amazing Light Effect Wallpaper in Photoshop CS4.


Step1:

Create a new document, Fill the Background layer with color = #11193c using Paint Bucket Tool.

Step2:

Select the Brush Tool and select Soft Round Pixel brush of size 300 or 400 from preset.

Make the Flow = 65%, color = #FFFFFF and make a blob at the bottom left corner.

Step3:

In a new layer create a blue box or Download from any stock site, I have created the blue-colored box for this tutorial.

Step4:

Create a new layer and rename it as “Ellipse”. Make an irregular ellipse using Lasso Tool and Fill it with #8CE3ED color, apply Gaussian Blur (Filter>Blur>Gaussian Blur). Change the opacity of the Ellipse layer to 85%.

Step5:

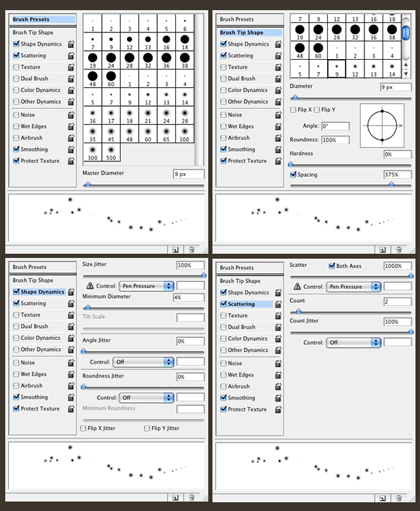
In order to create the sparks we will use the amazing brush engine. Add a new layer name it as  “Light Effects” layer, set white for the color and follow the images below.

Using the Layer Styles add a Outer Glow to the sparks.

Step6:

Lets add some smoke. Create a new Layer, call it “Smoke”. Change its blend mode to Color Dodge and select the Lasso Tool. Set 40px for Feather and create a selection like I did below.

After that make sure that the foreground is white and the background is black and apply a Filter>Render>Clouds.


Change the Blend Mode to Color Dodge. Tip: Continue applying the filter until you get the best clouds.

Step7:

Download Base 02 Font from http://www.dafont.com/base-02.font

Add some Text using Text Tool and change the Blend Mode of Text Layer to Color Dodge.


Rasterize the Text Layer, and add some Highlights/Midtones using Dodge Tool to the Text layer. Add some sparks around the Text using the Brush that we used in Step5.

Conclusion: If you know a bit of Layer Styles and the Brush engine in Photoshop you will be able to create amazing effects. It will depend exclusively on your imagination and playing with the tools. Sometimes just changing a some settings and you get a totally different effect.

____________________________________________________________________________________________

So this is it from my side, now its your turn to yep. Feel free to add comments. Let’s share pretty things!

Know more about my work @ www.yagneshahir.in

Quick and Easy Typographic Portrait in Adobe Photoshop CS4


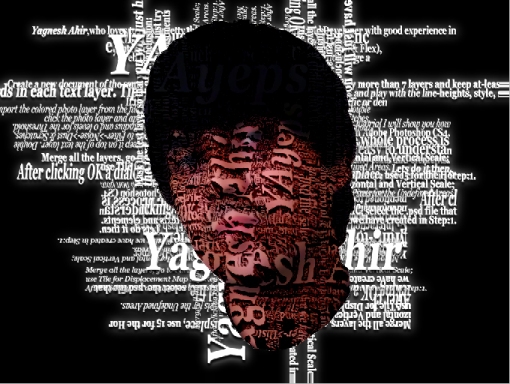
In this tutorial I will show you how to create a really cool and easy typographic portrait in Adobe Photoshop CS4. The whole process is quite simple and easy to understand, but it might take some time to add too many texts and elements. Lets do it then.

Step:1

Open Photoshop CS4, create a new document of any size. Import a photo of yours. Extract the background of you photo.

Duplicate the layer of your photo. Go to Image->Adjustments->Desaturate or press Shift+Ctrl+U (apply to the top layer of your photo). Save the file as .psd.

Step:2

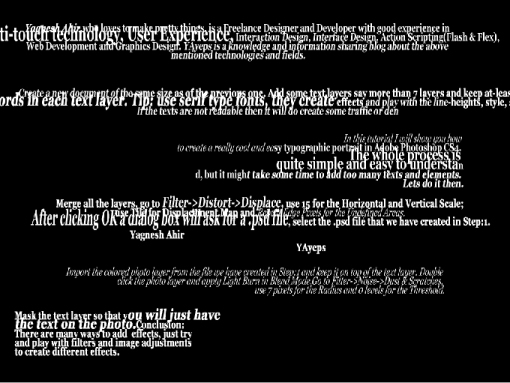
Create a new document of the same size as of the previous one. Add some text layers say more than 7 layers and keep at-least 40-50 words in each text layer. Tip: use serif type fonts, they create effects and play with the line-heights, style, size of the text. If the texts are not readable then it will do, try to create some traffic or dense forms of texts.


Step:3

For each text layer, go to Layer->Layer Style->Drop Shadow, use Multiply for the Blend Modeblack for the color, 90º for the Angle and 5 pixels for Distance, Spread and Size.

Group all the layers and duplicate the group. Select the top-most group and then go to Layer->Merge Group.

Go to Filter->Blur->Gaussiun Blur, use 10 pixels for the radius.

Keep the blurry layer behind the regular one, the idea is to add some depth and thats why the shadow  effect is created by blurring the text layer.

Step:4

Merge all the layers, go to Filter->Distort->Displace, use 15 for the Horizontal and Vertical Scale; use Tile for Displacement Map and Repeat Edge Pixels for the Undefined Areas. After clicking OK a dialog box will ask for a .psd file, select the .psd file that we have created in Step:1. After selecting the file the text layer will mask the desaturated photo layer of the selected file and text layer will create some depths and some displacements.

Step:5

Import the colored photo layer from the file we have created in Step:1 and keep it on top of the text layer.

Double click the photo layer and apply Light Burn in Blend Mode.

Go to Filter->Noise->Dust & Scratches, use 7 pixels for the Radius and 0 levels for the Threshold.


Step:6

Mask the text layer so that you will just have the text on the photo.

Conclusion: There are many ways to add effects, just try and play with filters and image adjustments to create different effects.

____________________________________________________________________________________________

So this is it from my side, now its your turn to yep. Feel free to add comments. Let’s share pretty things!

 Know more about my work @ www.yagneshahir.in